Tuesday, September 30, 2014

Recipe - Pumpkin Cheesecake


A couple of weeks ago my son, Dylan, was helping to plan a nice dinner with his friends for their dates to the Homecoming dance. One boy's grandma agreed to host an Olive Garden style dinner in her backyard, with the other boys bringing smaller parts of the meal.  Dylan a bit presumptously volunteered his sister Jessame's famous Pumpkin Cheesecake for dessert, then hurried straight home from school and called her at work to solicit her cooperation.  As luck would have it, she was planning to come home to visit that weekend anyway, and she emailed him a shopping list of ingredients.  Their agreement involved his promising to devote his Friday evening to helping her in the kitchen, then doing the clean-up.  I stayed out of the way, and I must say what emerged the next evening was truly spectacular.  After a few tense moments which involved she and I trying to move the cheesecake to a platter, (Jessame successfully disguised any flaws with extra caramel sauce and ginger snap crumbs) we safely delivered the "Pretty as Olive Garden" servings of cheesecake to the dinner location with sighs of relief.  The next day, Dylan told us that one of the young ladies enthusiastically proclaimed it "the best thing she had ever eaten in her life."  I have asked Jessame to share her recipe with you for this beautiful fall dessert.

Jessame is also responsible for Guest Posting this week's Tip of the Week.  She really has her ear to the ground when it comes to finding great deals on almost anything!  Her post describes how four of us had a big breakfast at Chik-fil-A one morning for only $3.34 total!  I think you will find her advice on taking advantage of promotions and coupons from local eateries very interesting and informational.  See Tip of the Week below this post.

Olive Garden Pumpkin Cheesecake


Hi everyone! Jessame here. I'm so excited to share one of my favorite recipes with you! I've made a few adjustments to this recipe and included some of my own advice, but the base recipe comes from CopyKat Recipes at copykat.com

Ingredients:


Crust:

1 1/2 cup graham cracker crumbs
1 cup ginger snap cookie crumbs
1/4 cup sugar
1/2 teaspoon cinnamon
8 tbsp melted butter

Pumpkin Layer:

3 8-oz. pkgs. cream cheese
1 15-oz. can pumpkin puree
2/3 cups packed light brown sugar
3 eggs
1 tsp. vanilla
1/2 tsp. salt
1/2 tsp. ground cinnamon
1/2 tsp. nutmeg
1/4 tsp. ground ginger
1/4 tsp. ground cloves

Sour Cream Layer:

1 cup sour cream
1/4 cup sugar
1 tsp. vanilla
1/8 tsp. cinnamon
1/8 tsp. nutmeg

Whipped Cream:

1 pint heavy cream (you may not need to use it all)
1/8 cup sugar (Taste and add more sugar to desired sweetness)
1/4 tsp. vanilla

Additional topping:

Jar of Caramel sauce
Gingersnap crumbs

Instructions:


1. Get your cream cheese and eggs out of the fridge so they can come to room temperature before you mix them.

2. Drain the pumpkin using paper towels and/or a wire strainer. CopyKat suggests that you gently wrap the puree in paper towels to remove the water and continue doing so with new paper towels for about an hour before mixing up your cheesecake. I prefer to put the pumpkin in a wire strainer and press it with paper towels to push the excess water out. If you do this several times until the pumpkin feels quite dry and no more water is coming out, it will take significantly less time than CopyKat's method.

3. Grind your graham crackers and gingersnaps separately from each other in a food processor or blender until they are quite fine. Use these fine crumbs for your crust. Grind the gingersnaps for the topping separately so that they are not so fine---I prefer putting several in a plastic baggie and smashing them up good rather than actually grinding them so that they are chunkier for the topping.

4. Preheat your oven to 350 degrees.

5. In a medium sized bowl, combine the crust ingredients and mix well. I like to use my hands to do this. Press the crust into the bottom and halfway up the sides of an 8 inch nonstick spring form pan. You do not need to grease the pan. Refrigerate the crust while you mix up the filling.

6. Beat the cream cheese until smooth. A professional cheesecake baker once told me that the secret to good cheesecake is mixing it up by hand, and I tend to agree. But if your cream cheese isn't soft enough or you just don't think you have the strength to mix it by hand, use an electric mixer.

7. Once the cream cheese is smooth, beat the eggs in one at a time, mixing one egg in completely before adding another. Add the remaining ingredients and blend until very smooth.

8. Remove the crust from the refrigerator and pour in the filling.

9. Bake for 30 minutes at 350 degrees. Don't take it out of the oven yet. Reduce oven temperature to 325 degrees and cook for 30 more minutes. When you remove the cheesecake, it should be a little jiggly in the center. Leave the oven on at 325 degrees.

10. Begin preparing your sour cream layer after the cheesecake is out of the oven. Blend all the ingredients for the sour cream layer and then spread it evenly over the cheesecake.

11. Put the cheesecake back in the 325-degree oven for 8 more minutes so the sour cream layer sets.

12. After the cheesecake is completely cool, remove it from the springform pan.

13. Use an electric mixer to whip your cream with the sugar and vanilla until it forms stiff peaks.

14. Pipe or spread the whipped cream over the cheesecake. Refrigerate the cheesecake if you're not ready to serve it yet.

15. When you're ready to serve the cheesecake, drizzle the top with caramel sauce and the chunky ginger snap crumbs.

16. Enjoy!

Tip of the Week: Restaurant Coupons

Hi, everyone! This is Jan's daughter Jessame. Mom asked me to do a guest post this week about restaurant coupons.

We are fortunate in Cache Valley to have an unusual number of restaurant discounts available to us. Even chain restaurants often have daily specials or distribute coupon mailers on a regular basis for specials I never see in Salt Lake. For example, one of my favorite lunchtime restaurants, Paradise Bakery, never distributes coupons in Salt Lake---they don't even have a birthday club. But in Logan, Paradise Bakery sends out mailers every month with coupons for 40% or 50% off your entire meal, plus they have a huge list of daily lunch combo specials at the restaurant. If you play your cards right, you should almost never pay full price to eat out in Cache Valley, no matter where you want to go.

With that in mind, I would like to share with you the gem of Cache Valley savings: the Cache Valley Direct Book


Unlike other coupon books, such as the Entertainment book, which mostly have coupons for new or less popular restaurants, Cache Valley Direct has coupons for all the places you want to go. Some of my favorites from last year included Cafe Sabor, Juniper Take-Out, Noodles & Company, Rumbi Island Grill, Cold Stone, Firehouse Pizza, Willows Miniature Golf Course, and the Utah Festival Opera. Most coupons are buy one get one free. 


Not only does Cache Valley Direct have great BOGO coupons, the front of the book always includes tear-out coupons for completely free items, such as a small cheese pizza at Dominos, a free cookie at Paradise Bakery, and a free breakfast sandwich at McDonald's.


Another perk is that you can use coupons from up to three books at the same time! So you don't have to worry about that pesky one-per-table rule. If you have a family of six and want to buy three books, or if you want to go out with friends who have their own books, you can all get a discount! We always buy three books---one for my grandparents, one for my parents, and one for Dylan and I---so when I come to town, all six of us can go out and use our coupons together.

Not only is Cache Valley Direct a great bargain, but you can support your local schools by buying one. The books cost $25, and the school gets to keep 50% of that money. Last year, both South Cache and Providence Elementary participated in the fundraiser, so if you know a child that attends one of those schools, ask them about it. Or keep an eye on Cache Valley Direct's facebook page for more information. Books for the coming year should start going on sale October 1.

The same company also puts out Dixie Direct and Idaho Direct, so if you have relatives in St. George or Idaho, or if you visit there often, you may be interested in those books as well.

Using coupons for eating out can save you tons of money. For example, a couple weeks ago when I visited Cache Valley, Mom, Dad, Dylan, and I ate breakfast at Chick-fil-a to use up our last few Cache Valley Direct coupons before they expired. Here is what we got:


2 oatmeals with fruit and nuts, 3 cinnamon clusters, 2 breakfast sandwiches, an order of hashbrowns, and 2 diet cokes (I confess, I love diet coke for breakfast).

Here is what we spent:


Yes, that does say that our total was $3.34. And we got $22.98 worth of food. How did we do it?

We used the free oatmeal and free cinnamon cluster coupons from our Cache Valley Direct books, another Cache Valley Direct coupon that gave us a free breakfast entree when we bought a hashbrown and a drink, and the September free breakfast sandwich and drink from my mom's Chick-fil-a cow calendar.

Oh, hadn't I mentioned the cow calendar yet?

Chick-fil-a does a great promotion every year at Christmastime where you buy their cute cow calendar for $6 and it comes with at least one free item for every month of the year. This year, $6 got Mom

January - Medium bowl of soup
February - Large waffle potato fries
March - Fan favorite classic entree
April - Large drink
May - Entree salad
June - Grilled chicken sandwich and large drink
July - Small handspun milkshake
August - Large drink
September - Breakfast entree and a large drink
October - Large drink
November - Mystery offer
December - Spicy chicken sandwich

Plus she got a humorous cow calendar featuring pictures of the cow family on vacation.


These calendars come out every year a few weeks before Christmas and can be purchased at Chick-fil-a. They could even make a fun and different Christmas gift.

Hopefully this will provide some inspiration to start you on the road to serious savings and enable you to recreationally eat to your heart's content (right Grandpa?)  And if not, at least you got to see some funny cow pictures.


*I just learned that all Utah Chick-fil-a restaurants will be giving away free breakfast every Wednesday this month from 6:30 a.m. to 10:00 a.m.! Today was a free 3-count chicken minis. Next week will be a free bacon, egg, and cheese biscuit. All you have to do is go into the store or through the drive thru and tell them you want the free breakfast item. No purchase necessary! One per person, and you have to be present to get one. All the info is on their facebook event page.

Tuesday, September 23, 2014

Recipe - Breakfast Pizza


I'm always on the lookout for new, uncomplicated recipes to break the monotony of having the same meals over and over.  With only three of us now, we often turn to breakfast foods for dinner---waffles, pancakes, scrambled eggs, etc.  Easy, quick, but a little boring.  Lately I've been seeing recipes for Breakfast Pizza springing up everywhere, and the photos make it look so delicious I decided to try creating my own version.  It seems this dish can be almost anything you want it to be and is a great way to use up leftover ingredients--from that half of a green pepper or purple onion in your produce drawer to odds and ends of cheese and a partially used package of bacon.  After all, who doesn't like pizza?  I tried one for the first time last night, and somehow a can of crescent rolls and some tater tots (plus a few other little tricks up my sleeve) transformed into a fun, creative meal we all enjoyed.

See my Tip of the Week post below to learn how you and your family can become more self-sufficient by raising your own chickens for Eggs.  To read about our experience, go HERE.


Breakfast Pizza


1 can Crescent Rolls  

Hollandaise Sauce Packet, made according to pkg directions
Frozen Tater Tots 
Fresh Spinach 
Green Onions
Tomato, seeded
6 Large Eggs
6 to 8 Slices Bacon, cooked
Shredded Cheese  
Cilantro or Chives to garnish—if desired

First get your ingredients ready:

1.  Wash, slice, and dice onions, tomatoes, and cilantro.


2.  Cook bacon (I like to cook it on a cookie sheet in a 400 degree oven for about 15 minutes).  This can be done early in the day and refrigerated.  Even thought you don't need this much, cook a whole package and freeze the rest for other uses.


Try cutting the cooked bacon into pieces with scissors--it only takes a minute.


3.  Make up Hollandaise Sauce according to package directions, including the teaspoon of lemon juice called for.  Keep in fridge until ready to use.


4.  Open crescent rolls and lay the triangles out on a pizza pan.  Press to stretch and seal edges together to form a crust.


5.  Bake at 375 degrees for about 5 minutes to firm it up a bit.  Take it out and let it cool a bit.

Get the Tater Tots ready after you take the crust out. Turn oven up to 425 degrees and cook about a third of a bag according to package directions, taking them out of oven before they are fully cooked, as they will finish cooking when you add them to the pizza.  Then turn the oven back down to 375 so it will be ready to cook the pizza.


6.  Remove from oven and spread on Hollandaise sauce.  You will not use the whole amount.
7.  Lay spinach leaves over sauce.


8.  Sprinkle on desired amount of grated cheese and circle the outside edge with cooked Tater Tots.


9.  Add onions, tomatoes, and bacon.


10.  Crack eggs one at a time into a small bowl and carefully pour at intervals onto the pizza.  Salt and pepper the eggs.


11.  Place in a 375 to 400 degree oven and bake until eggs are desired doneness.  When the whites look set up, the yolks are probably done as well.  Watch carefully so it doesn't overcook.  This takes approximately 15 to 20 minutes.

12.  Remove from oven and sprinkle with minced cilantro or chives. Serve immediately.


Remember to scroll down to read my "Tip of the Week" about our family's experience with raising our own chickens.

Tip of the Week - The Egg and I

so much depends
upon

a red wheel
barrow

glazed with rain
water

beside the white
chickens


-William Carlos Williams
 

Three or four summers ago, we became discouraged with all the grasshoppers attacking our raspberries.  It seemed like the little pests were coming down in swarms from the fields behind our house. We decided it might be a good idea to raise a few chickens to eat the grasshoppers before they could make their way into our garden.  So that next winter my husband bought some baby chicks and he and our son set up a little comfy cage for them with a heat lamp in our basement.  When spring came, the chicks had grown enough to go outside.  Six cute chickens in a variety of colors from white to black.  Our son, Dylan, gave them cute names like Barbeque, Drumstick, and Eggbert, and soon we had all fallen a bit in love with our new "pets."


My husband built them a little chicken coop with a "chicken run" and fenced in an area for them to enjoy pecking about.  They seemed so happy in their new home, and would run to greet us to the edge of the fenced enclosure whenever our car pulled into the driveway.  They were really loveable, but no one loved them quite so much as my husband, John.  This is one of my favorite photos of him with one of his little pals.


During this process, I never really thought about the fact that one day they would lay eggs. When the eggs started to appear, in the same variety of colors as the chickens, I was a little freaked out at the idea of eating them.  Brown eggs?  I am no farm girl, and had never eaten an egg that didn't come from the store. My husband and son were enthusiastic about using them from the start, but I wanted no part of it.  The idea of eating eggs from the Petersen's backyard didn't seem to bother our neighbors at all, so they helped take some off our hands in those early days.


As time went on, using the eggs started seeming a bit less weird to me.  I started allowing the occasional white egg (Eggbert's eggs were white) into a cake or batch of cookies--along with some "normal" store eggs.  I even sometimes ate the finished baked item along with the rest of the family.  I don't know when it exactly happened, but eventually I came around.  Maybe it was seeing those cute chickens in the backyard, looking so clean and healthy--and happy!


Now I love the chickens and their eggs.  The store eggs seem pale and and kind of flavorless to me.  I haven't bought eggs in several years, and we are on our second generation of chicken friends.  Sadly, Drumstick and Barbeque have now left us, which is another fact I've had to face--chickens don't live forever.  Even so, they have helped us progress a little further towards becoming self-sufficient, which is what provident living is all about.


To learn how to raise your own chickens, check out the following web sites:

http://urbanchickens.org/raising-baby-chicks/

http://www.backyardchickens.com/a/how-to-raise-baby-chicks-the-first-60-days-of-raising-baby-chickens

http://www.hobbyfarms.com/livestock-and-pets/healthy-chick-tips.aspx

See you next week!

Tuesday, September 16, 2014

Recipe: Slow Cooker Italian Chicken

Good Morning Sisters!

It seems I've really focused on chicken the past few weeks.  Although this hasn't been intentional, when I think about it, the high price of meat, especially beef, may have something to do with it.  I ran into Maceys yesterday to grab a few last minute items before their Case Lot Sale ended, and as I passed the meat department, I couldn't help but notice people solemnly studying the cuts of beef trying to figure out what to get for dinner.  No one seemed to be putting anything in their carts--ground beef included.  Even pork, that old inexpensive standby, has raised quite a bit in the past year.  All the more reason to make weekly meat choices based on what's on sale, then put another package or two away in the freezer for later.

Yesterday I had the interesting experience of receiving a letter from a sister in our stake, Kathleen Sneddon, who is currently serving with her husband as a missionary in the African Congo, helping President Bryce and Sister Karol Cook.  She wanted to know if I could send her a recipe for Slow Cooker Italian Chicken (she had left her own recipe at home) so she could make it for a gathering of Senior Missionaries plus construction workers assigned to train locals with a goal to start the Kinshasa Temple.  One of the main ingredients of this recipe is a packet of Italian Seasoning Mix, which, not surprisingly, is unavailable to her there.  I was fascinated by her report of the difficulty--and expense--of buying the food she needs in that location.  Here is an excerpt from her email, used with her permission, which I thought everyone would find interesting:

"Kinshasa DRCongo is located on the Congo River; however, there are serious and dangerous rapids in the river between us and the coast.  Hence no boat travel to Kinshasa. Everything we have comes either by truck (about 100 miles) or airplane. There is no fresh milk but packaged from either France or Belgium, as are all dairy products. Occasionally we can find butter lettuce on an early Saturday morning which would have arrived via the passenger plane from Brussels Friday night.  We have learned if we find something we like, to buy it! We may not see it for many months. Recently I discovered I was low on baking powder and hunted all over town for it.  As for food cost, I read your “Savings for Sisters” and almost cry at the prices. A couple quick examples: I frequently pay a dollar for a single carrot, potato or apple. A very small bag of onions will cost $4 dollars. I would like to add celery to some soups and stews, and while it is hard to find, when I do I hate to pay the price of $10 or more for a small scrawny bunch.  Milk nearly $4.00 a liter (a liter is approximately a quart).  If we want to eat, we get to the point where we don’t think of prices."  

I don't know about you, but her letter really made me feel grateful that for the present at least, we can feed our families so cheaply and with such ease.

I went on the Internet to find ideas for how Sister Sneddon could mix up her own Italian Seasoning Mix so she could recreate, as closely as possible, the Italian Chicken for the missionaries.  The recipe for this easy dish is below, and in the Tip of the Week below that, you will find my version of the seasoning mix, which I tested yesterday before I sent it to her.  Although the flavor of the finished dish came pretty close, I must admit I still somewhat prefer the store-bought version.  However, making your own seasoning mixes is much more economical (Good Seasons Mix is $1.79 a packet) and it's handy to know how to make your own and avoid running to the store.  In general, the less we have to rely on processed and packaged food, the greater the overall health benefits to our family, not to mention having that nice feeling of confidence in our own self-sufficiency!


Slow Cooker Italian Chicken

4 - 6 Boneless Chicken Breasts cut into chunks
½ lb Fresh Mushrooms (optional)

1 Can Campbell’s Cream of Mushroom Soup

1 packet Good Seasons Italian Dressing Mix (or 2 Tablespoons of homemade mix)

1 cup Sour Cream

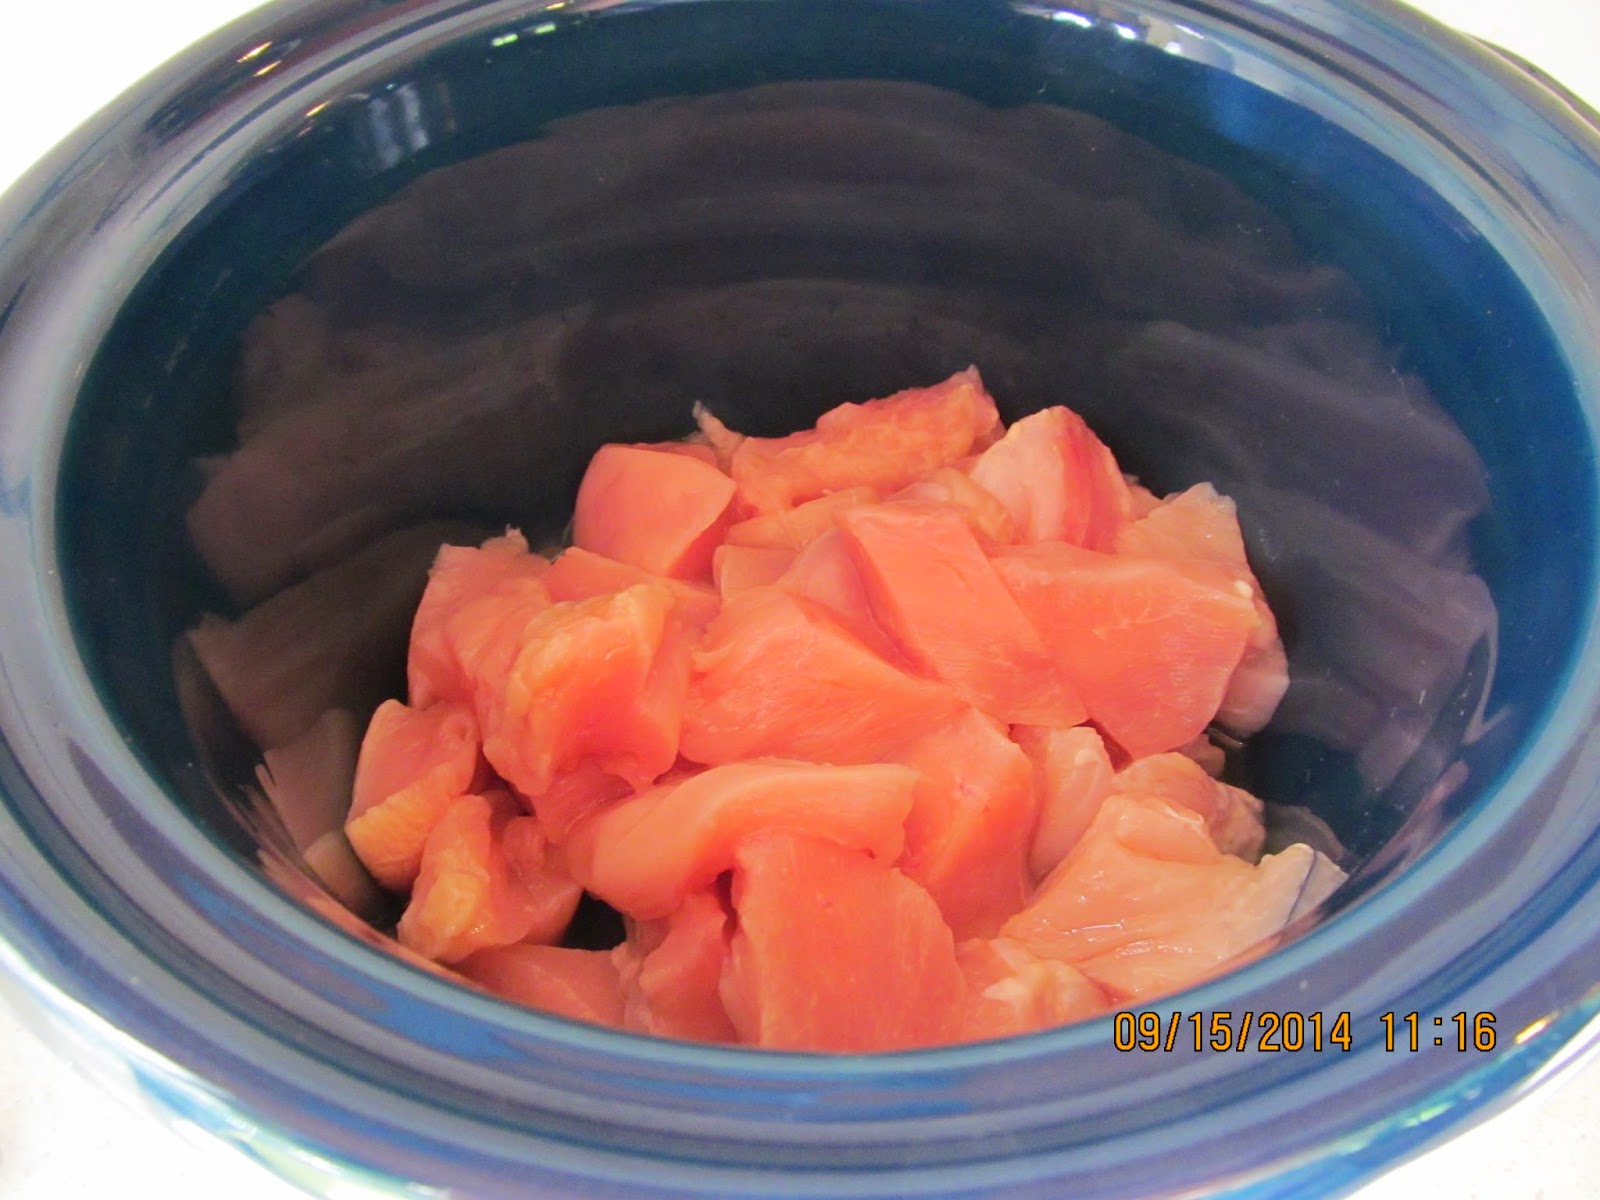
Cut chicken breasts into chunks and place in crock pot.   
On top of chicken spoon 1 can Cream of Mushroom Soup.  
Sprinkle 1 packet Good Seasons Italian Dressing mix (or 2 Tablespoons homemade mix) on top of that.  Do not stir together.
Cook for about 5 hours (start on high for first hour, then change to low).  Or if you’re not going to be home, you can cook on low for about 5 or 6 hours.  During the last hour, you can throw in some fresh (or canned) mushrooms if desired.
This is what it looks like when it's finished.  Don't worry--it hasn't been stirred yet.  When ready to serve, add 1 cup sour cream and stir all together for the first time.   
Now that's better!  Serve over any kind of Pasta.
 Note:  You can also leave the breasts whole if you want--you don't have to cut it up and serve over pasta.

*You can also double the soup and Italian dressing for this if you want extra sauce in proportion to the amount of meat.  In that case, you also need to add some more sour cream.

** Don't forget to see my Tip of the Week in the post directly below this one to learn how to make your own Seasoning Mixes, including the Italian Dressing Seasoning used in this recipe.

Tip of the Week: Make Your Own Seasoning Packets


Even though this looks like a big old drawer of Seasoning packs, there are only a few that I consistently rely on: Taco Seasoning (for seasoning ground beef used in many Mexican dishes), Italian Dressing (for recipes such as Italian Chicken featured this week), Gravy Mixes (all flavors--used to extend homemade gravy), Au Jus (for French Dip Sandwiches or Prime Rib), and Hollandaise (for serving over broccoli and asparagus or making Eggs Benedict).

I spent some time on-line looking for a Italian Seasoning Packet substitute for Sister Sneddon to make her Italian Chicken, and I found lots of recipes for other seasoning mixes as well. I have included some of the recipes I found below, but remember that I have only tested the Italian Dressing Mix.

It's nice to eliminate the preservatives and ingredients such as MSG and Gluten. It's also great to not have to be reliant on these mixes when you run out. That being said, I appreciate the convenience of these seasoning packets, especially when they can be purchased at 3/$1.00 as featured at Maceys during the case lot sale the last couple of weeks.

I think the biggest benefit to making your own (besides the savings) is that once you are sure you like the spice combination, you can mix up a large quantity at once, being sure to indicate on your container how much to use for the equivalent of a seasoning packet.
Italian Salad Dressing Mix 
-1 Tablespoon Salt
-2 Tablespoons Oregano
-1 Tablespoon Onion Powder
-1 Tablespoon Garlic Salt
-1 Tablespoon White Sugar
-1 Tablespoon Dried Parsley Leaves
-½ teaspoon Black Pepper
-1 teaspoon Basil
-¼ teaspoon Thyme
-½ teaspoon Celery Salt
-½ teaspoon Red Pepper Flakes (optional)

*Use 2 Tablespoons of this mix in place of a packet of Good Seasons Dry Italian Salad Dressing Mix.  This recipe makes approximately the equivalent of 3 packets of mix.

Taco Seasoning Mix
-1 tbsp chili powder
-1/4 tsp garlic powder
-1/4 tsp onion powder
-1/4 crushed red pepper flakes
-1/4 tsp oregano
-1/2 tsp paprika
-1 1/2 tsp cumin
-1 tsp salt
-1 tsp black pepper

French Onion Soup Mix 
-1/2 cup Onion Flakes or dehydrated onion slices
-2 tablespoons Onion Powder
-1 tablespoon Garlic Powder
-1 teaspoon Celery Salt
-1/2 teaspoon Ground Pepper
-1 tablespoon sea salt

Seasoned Salt Mix 
-1/4 cup Onion Powder
-1/4 cup Garlic Powder
-1/4 cup Black Pepper
-2 tablespoons Chili Powder
-3 tablespoons Paprika
-2 tablespoons dried Parsley Leaf (optional)
-1 tablespoon ground Red Pepper Flakes (optional)

Homemade Ranch Mix
-½ cup dry buttermilk powder
-1 tablespoon dried parsley for blending, 1 teaspoon reserved
-½ teaspoon dried dill weed for blending, ½ teaspoon reserved
-1 teaspoon onion powder
-1 teaspoon dried onion flakes (or dried chopped onion)
-1 teaspoon salt
-1 teaspoon garlic powder
-1 teaspoon garlic salt
-¼ teaspoon ground pepper
-½ teaspoon sugar

Instructions for Ranch Mix:
Add all the dry ingredients except the reserved teaspoon of dried parsley and the ½ teaspoon of dried dill to your blender. Blend until a nice powder.
Hand mix in the reserved parsley and dill - you want to see some herbs in your mix. 

Store dry mix in an air-tight container or jar in your pantry for 2-3 months or in the freezer for 6 months or longer.

Note: Use 2 tablespoons of dry mix in any recipe asking for dry ranch mix.

See you next week!

Tuesday, September 9, 2014

Recipe: Chicken Spinach Alfredo Lasagna

Good Morning Sisters:

After last week's blunder, I think I got it right finally with the Case Lot Sale listings. I even did a bit of case lot shopping myself at both Smith's and Maceys last Thursday. Sales go on for one more week, but at Smith's it's while supplies last. You should also note that Smith's requires purchase of a full case to get the lowest price, whereas Maceys does not, so think about whether you need a whole case before deciding where to buy the products you need for your storage. For example at Smith's you can get Kroger Tomato Sauce for $.20/can if you buy a case of 24 for a total of $4.80 a case. I can easily use that much in a year. But a 48 can case of Campbell's Tomato Soup, even though it's cheaper can for can than Maceys, is more than I need right now, so it was better for me to just buy 12 cans at Maceys. In my food storage inventory I also discovered I was down to my last 25 lbs of flour, so it's definitely time to replenish my year's supply. Please note that Lee's Case Lot Sale has not started yet, so if you don't get your shopping done this week, some of the same prices will surely be repeated on the Lee's sale in a few weeks.

My garden tomatoes are on in full force now, so last week I made a couple of trays of Oven Roasted Tomatoes.  These are just like Sun-dried tomatoes, only you do them in the oven (does anyone really leave them outside in the sun? I keep thinking about bugs crawling all over them). These are great to have on hand in your freezer during the winter months to use on pizza, sandwiches, or various recipes such as my Chicken Spinach Alfredo Lasagna. This recipe makes use of store-bought Alfredo sauce, which is a real time saver. I made this for "Fast Saturday" dinner over the weekend, and even though it easily divides into 12 servings to feed a crowd, one teenage boy at our table (I won't name names) managed to devour two squares before the rest of us knew what had happened!


Chicken Spinach Alfredo Lasagna


Ingredients:
1 (16 oz) pkg Lasagna Noodles
1 pkg Frozen Chopped Spinach
2 lbs. boneless Chicken Breasts
2 jars Classico (or other good brand) Alfredo Sauce – any variety
1 lb Shredded Mozzarella or Italian Blend Cheese
6-8 oz Shredded Parmesan Cheese
1 large (30 oz) carton Ricotta Cheese
½ lb sliced Mushrooms
1 medium Onion, chopped or 1 bunch sliced Green Onions
½ cup diced Sun Dried or Oven Roasted Tomatoes or 1 diced Red Bell Pepper
½ teaspoon Garlic Salt or 3-4 cloves garlic minced
Salt and Pepper

(Note: If you want to make this into a Vegetarian Dish, just omit the chicken and increase the amounts on the veggies a bit).

Cook chicken breasts in small amount of water, sprinkled with salt, and covered with foil in a 375 degree oven until over 165 degrees (or until no longer pink inside--about 45 minutes). Cool and dice with sharp knife or electric knife.

Remove any fat you see before dicing.
Wash and slice mushrooms and dice oven-roasted tomatoes. Chop onions or slice green onions.


Run hot water over frozen spinach in a colander. Squeeze out all water (you can do this with clean hands, as if you were wringing a cloth) and drain on paper towel. It should end up in a damp clump, no longer dripping water.


Mix Spinach with Ricotta cheese, ½ teaspoon garlic salt and 1/8 teaspoon black pepper.

Saute onion and mushrooms (and red peppers if you are using them instead of the tomatoes) in small skillet in a bit of butter, sprinkling lightly with salt and pepper (you can do them in the same pan). If you are using green onions, add them to the spinach mixture instead of sauteing. Drain off any juices and discard. If you are using real garlic, sauté it with this mixture for the last couple of minutes.


Mix together the Alfredo sauce (save 1/3 of one of the bottles), chicken, onion, mushrooms, roasted tomatoes.

Bring a large pot of water to a boil (add at least a Tablespoon of salt to the water). Add noodles and cook for 8 to 10 minutes or until al dente (do not overcook--it will soften a bit more in the oven); Rinse well in cold water. Drain.


In a large oblong glass baking dish, spread out the remaining sauce before laying down the first layer of noodles. Then place a layer of lasagna noodles.

Sprinkle on half the Parmesan. Spread chicken and Alfredo sauce mixture over. Sprinkle on ½ of the mozzarella.

Top with another layer of noodles. Spread 1/2 spinach mixture evenly over noodles.

Sprinkle on the other half of the Parmesan. Spread on the rest of the spinach mixture and the rest of the chicken mixture. Sprinkle with remaining mozzarella.

Cover until ready to bake. Bake covered with foil at 350 degrees about an hour (15 minutes or so longer if it’s been in the fridge). Remove the tinfoil for the last 20 minutes.

Remove from oven and let stand about 15 minutes before cutting.

Serves 8 to 10.


Remember to scroll down to look at the Tip of the Week--Oven Roasted Tomatoes.