Then I started doing research. I was very intrigued by the whole idea of essentially eating flowers, and was soon immersed in fascinating explanations of how to tell the girl blooms from the boy blooms. The females, it turns out, should not be harvested if you want to eventually eat the tiny squashes growing from them. The males are needed to pollinate the female squash plants, but you only need a fraction of the amount growing in your garden. Therefore, you can harvest some of the males (which are easy to distinguish from the females because of their slender stalk and lack of a baby squash) and just leave a few to do their duty, so to speak. Your zucchini and yellow squash will continue to produce just fine.
After reading numerous and varied versions of how to make Fried Squash Blossoms, I came up with my plan for a trial run. Because the blossoms open in the morning hours and close up again by afternoon/evening, I ventured out at 7 o'clock Sunday morning to gather them in. I had read that you should eat them the day you pick them, so I decided to make my attempt in time to serve them with our Sunday dinner. There were plenty to choose from, and it was easy to tell the boys from the girls.
I picked some zucchini and yellow squash while in my garden. The bigger ones I made yesterday into our family favorite--Crispy Squash. The yellow ones I sauteed and creamed for dinner tonight. As you can see, I believe in picking them when they are small and tender for the most part, but some get away from me!
Here are my gorgeous blossoms. I decided to pick 14, which would give 2 to each person and 2 left for making mistakes on. These are a mixture of zucchini and yellow crookneck squash, yet they all look alike. Who knew they were such a delicacy? These are sold at farmer's markets in places where they are plentiful, but they are still hard to come by and sell out quickly. Because they are so perishable, people who buy them know they need to be used as soon as possible. Squash farmers harvest them to sell to local restaurants.
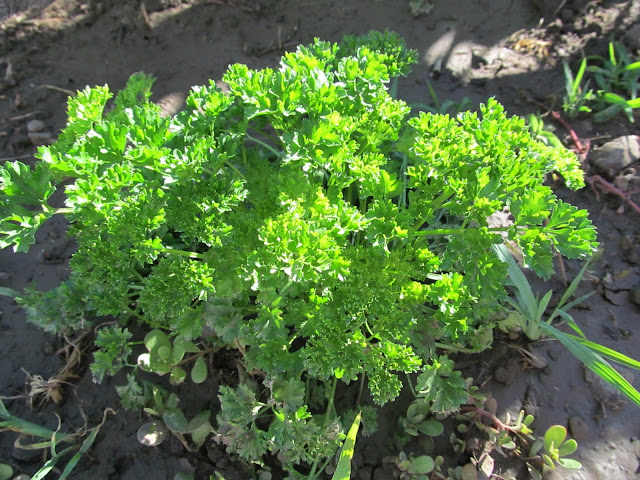
I took them straight to the kitchen and put them in the fridge, covered, until after church. I also cut some fresh parsley, chives, and basil to use in the recipe I concocted for the filling.
I hope I've sparked your interest in my Squash Blossom Adventure. To read more, scroll down past the grocery listings and see how they turned out. (HINT: They were delicious!)
Fried Squash Blossoms
For 12-15 squash blossoms. . .
Filling:
Heaping 1/2 cup whole-milk ricotta cheese
1 egg yolk
1/2 teaspoon dried oregano leaves
½ cup fresh ground bread crumbs
½ teaspoon salt
Heaping 1/2 cup whole-milk ricotta cheese
1 egg yolk
1/2 teaspoon dried oregano leaves
½ cup fresh ground bread crumbs
½ teaspoon salt
¼
teaspoon pepper
(Optional: fresh chives, parsley, basil—some of each or
whatever fresh herbs you have.)
Batter:
¾
cup cornstarch
1/4
cup flour
1 teaspoon baking powder
1/4 teaspoon pepper
1/2 teaspoon seasoned salt
1/2 cup water
1 egg
1 teaspoon baking powder
1/4 teaspoon pepper
1/2 teaspoon seasoned salt
1/2 cup water
1 egg
Vegetable oil for
frying
Wash the blossoms: Gently swirl them in a bowl of cold
water. Drain on a towel.
Mix up
the filling. Grind up some crumbs from whatever bread or
rolls you have on hand or in the freezer.
(You only need to use about one roll or slice of bread to make the ½ cup
crumbs). Stir this into the ricotta
cheese, egg yolk, seasonings, and herbs. Place in fridge.
Prepare
the squash blossoms.
Carefully separate the flower petals without breaking them and remove the
pistil in the center with scissors. Bring a small pot
water to a boil and prepare a bowl of ice water. Carefully place blossoms into the
boiling water, remove after a few seconds, transferring
immediately into the some ice water to chill. Remove and lay on paper towels to drain.
NOTE: This was an experimental process for me, and I decided that the boiling water process made the blossoms way too delicate. They were like tissue paper and the petals were very hard to separate. Next time I plan to just dip them by the stem, one by one, into boiling water for just a second or two, so as to not overcook the petals. I may also try filling them with no blanching at all, which some recipes suggest. If you do it this way, instead of the fold-over method I describe below, just twist the tops closed over the filling.
Fill
the blossoms: Spoon filling into a
zip-lock bag. Gently insert the cut
corner of the bag all the way to the bottom of the open end of a blossom and
pipe as much filling as each will hold. Pick up petals and drape them up over the
filling, covering filling completely. Fold any excess petals over the top of
the filled blossom to keep them out of the way.
This is the way they should all look!
But the reality? Some good, some not so good! Next time I plan to do a much better job, but since I made all the mistakes, you can do great the first time! Place
in the refrigerator for at least 30 minutes. If it will be longer than that, cover with plastic wrap.
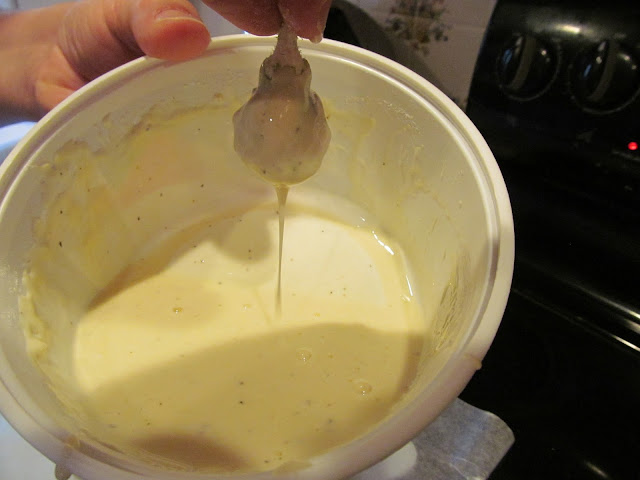
Make
the batter: Combine
the first 5 ingredients, and then stir in the egg and water until smooth. Refrigerate batter for at least 20 minutes.
Dust
with flour:
Dip each of the blossoms into flour and
shake gently or blow off the excess.
This will help the batter to stick.
Fry the
blossoms: Heat about an inch of oil in a skillet to 350
to 375 degrees.
Get the batter out of
the fridge and dip each blossom in batter, coating it. Carefully place each
batter-covered blossom in the hot oil and fry until golden crisp. Remove and drain on paper towels, then
sprinkle with salt to taste. Eat them down to the stem and discard the stem.Makes 5 appetizer portions of 2 to 3 each. Serve immediately.


No comments :
Post a Comment