Wednesday, May 27, 2015

Recipe - Slow-Cooked Crispy Pork Roast

When it comes to the best way to stretch your meat dollar these days, pork wins hands down, whereas beef, even ground beef, has at least doubled in price over the past couple of years. The cost of beef has skyrocketed to the point where you have to think twice about making your favorite hamburger casserole, while pork prices have remained relatively stable.  It is usually advertised during any given week at one of our local grocery stores for between one and two dollars a pound, depending on the cut.  Pork chops, spare ribs, bone-in or boneless roast---there are so many ways to cook and serve pork, and it is every bit as versatile as beef or chicken.  Pork Roast with Potatoes and Gravy has long been a staple in our family for Sunday dinner, but lately I've been experimenting with different seasonings and a longer, slower, cooking time, resulting in flavorful, moist meat that can be used in a variety of ways.  My Slow-Cooked Crispy Pork Roast is very easy to prepare and takes only a few ingredients.  Spend about ten minutes in the kitchen, then let the oven do the rest.  Serve immediately as part of a hot meal, or make ahead to use for sandwiches to feed a crowd this summer, topped with your favorite BBQ sauce. 


   Slow Cooked Crispy Pork Roast


4 lb bone-in Pork Sirloin Roast
1 ½ teaspoons Sea Salt or Kosher Salt
1 teaspoon Oregano Leaves
½ teaspoon Coarse Grind Black Pepper
½ teaspoon Garlic Salt
½ teaspoon Thyme Leaves

-Here are the cast of characters!  Measure and mix well.
-Rinse and dry roast and put in roaster pan.
-Sprinkle seasonings over all sides of the roast, using fingers to coat evenly.
-Place in oven uncovered and cook 1 hour at 400 degrees.  This is how it looks after an hour:
-Remove from oven and add one cup of water.
-Turn oven down to 275 degrees, cover the roast, and cook 4 to 5 more hours.  (Note:  If your roast is significantly larger or smaller than 4 lbs, adjust cooking time and amount of seasonings accordingly).  After 2 hours, check to see if there is still liquid in the bottom.  If it looks dry on the bottom of the pan or like it might start to burn, add another ½ to 1 cup of water.  Return to oven and continue to cook another couple of hours.
-When it is well done, the bones will be easily removed.  Break the meat into chunks with 2 large forks.  I think I could have taken this guy out a half hour earlier.  Keep a close watch, because you don't want it to dry out (but don't open the oven multiple times or it will never get done!)
Toss the meat into the remaining liquid to incorporate extra moistness and flavor.
-Serve as a main course with potatoes and vegetables OR on place on buns for shredded pork sandwiches topped with your favorite BBQ sauce.

Tuesday, May 19, 2015

Recipe - Grandma's Rhubarb Pie (also Pie Crust Recipe)

Sometimes we go our whole lives thinking we hate a certain food, just because we tasted it a few times prepared in a manner we didn't care for.  An example of this is people who don't like vegetables because their childhood meals included lots of canned and frozen vegetables cooked in a bland, uninspired fashion.  I, for example, never tasted fresh broccoli until I was in my early teens, and then only by accident.  Mom sent Dad to our local grocery store on his motorcycle (which usually increased his enthusiasm for such errands) with a list that included a package of  broccoli.  She didn't specify "frozen," and Dad, having never paid much attention to the source of the veggies on his dinner plate, arrived home with a huge bunch of fresh broccoli strapped behind his bike.  We were all amazed!  Mom had no choice but to cook it, and when we all dug in, there was no turning back (which Dad has congratulated himself for ever since!) 

So what is this story leading up to?  Well Rhubarb of course.  More specifically, Rhubarb Pie.  And to be even more direct, the best Rhubarb Pie known to man, my Grandma's Rhubarb Pie.  In honor of her birthday, which just happens to be this week, and also my friend, LaDawna, who generously supplies the main ingredient for my yearly craving, this week's featured recipe is Grandma's Rhubarb Pie.  Now I know there are many variations of this dessert, including the addition of strawberries, but to my family there is only one way to eat rhubarb, and this is it.  Grandma's recipe combines the tart, fresh rhubarb with (lots of) sugar, eggs, and tapioca, resulting in a sweet, custard-like filling that I have never seen duplicated.  I'm not so sure Grandma didn't create it herself!  Regardless of the recipe's true origin, trust me when I say that if you have never liked rhubarb before, this may just be the dish that turns you around for life.  Give it a try!  See instructions for the filling, and for my easy, flaky crust at the end of today's post.

By the way, if I haven't convinced you already, according to my research Rhubarb can be beneficial to aid weight loss (well, maybe not in pie form!) improve digestion, prevent Alzeheimer's disease, stimulate bone growth, increase skin health, prevent cancer, optimize metabolism, improve circulation, and protect against various cardiovascular conditions. Rhubarb is packed with minerals, vitamins, dietary fiber, protein, Vitamin C, Vitamin K, Calcium Potassium, and Magnesium. 


Grandma’s Rhubarb Pie
 One batch makes a large pie, and a double batch makes 2 large pies.  I always make one for now and one to freeze for later.

4 to 5 good full cups of sliced Rhubarb
1 3/4 cups Sugar
1 teaspoon Salt
3 level Tablespoons Flour
2 Tablespoons Minute Tapioca
3 large Eggs
Pastry for a 2-crust Pie (see recipe below)

 -Remove leaves from rhubarb and discard.  Wash well and slice.  Measure into a large bowl.


-Mix up the sugar, salt, and flour.  Pour this over 4-5 good full cups sliced Rhubarb, mix well, and let sit while you mix up your crust—at least a half hour.-Roll out and place bottom crust (see recipe below or use your own) into large pie plate. -Sprinkle bottom of crust evenly with 2 Tablespoons Tapioca. 

-Pour Rhubarb mixture in and spread evenly. 

-Drizzle 3 beaten large eggs evenly over the filling. 


-Put top crust on and seal/crimp edges.

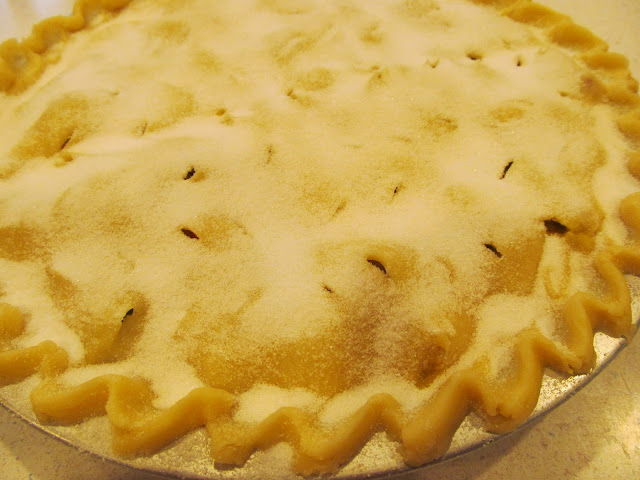
Sprinkle sugar generously on crust and bake at 400 degrees for about 50 minutes or more until nicely browned.
It’s good to cover the edge of the pie lightly with a strip of foil when it goes in to prevent over-browning (I make this by folding a piece of foil in half then cutting into a 1-inch thick circle).
Remove the foil for the last 10 to 15 minutes to brown the edges.
Cool about an hour or two, then serve while still a bit warm with vanilla ice cream.
Favorite Pie Crust

-In mixing bowl place 3 cups flour, ¼ teaspoon salt, 2 Tablespoons sugar and mix together. 

-With pastry blender, cut 1 ¼ cup shortening into dry mixture until part is like cornmeal and part is like small peas (as my Beehive teacher taught us oh so many years ago!)
In small bowl, use a fork to whisk 5 Tablespoons cold water with 1 Tablespoon Vinegar and 1 large egg. 
Pour this into flour/shortening mix and stir quickly with fork until it comes together, then form gently into a ball.
If you want to make 2 double crust pies, divide the ball of dough into 4 pieces, with 2 being the same size as each other and the other two also being the same size as each other, only about ¼ smaller than the first two.  This is because the larger two will be for the bottom crusts, and the smaller two will be for the top crusts.
At this point it can be refrigerated until ready to roll out, wrapped in plastic wrap.  Or you can just roll it out immediately.
Sprinkle flour on clean counter and on rolling pin.  You don’t want to overdo the flour on the counter or the dough will be tough.  You also don’t want to have to re-roll it, or it won’t be as flaky. 
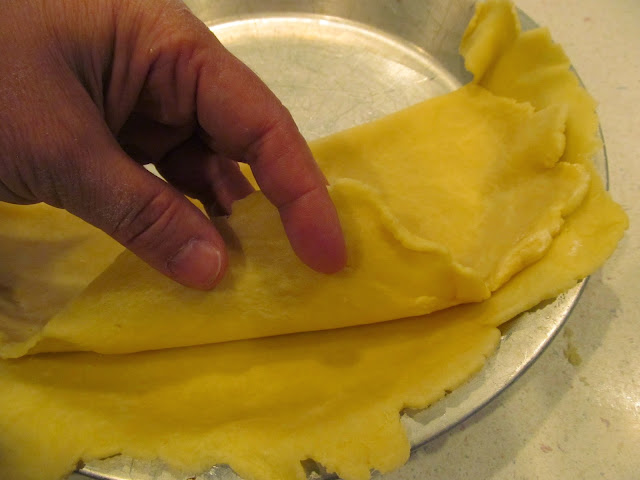
Just add the right amount of flour to be able to lift it up off the counter, and be gentle when handling it, folding it carefully in half for maneuvering, as shown.
Roll out the two bottom crusts, add filling, then roll the top crusts, making some slits with a butter knife for the filling to bubble through.  
Crimp and seal the edge using both thumbs and both forefingers.
This only shows me using one hand (even though you need to use both hands) because I was taking the photo with the other hand! 

Sprinkle with sugar and bake according to recipe instructions for the type of pie you are making.
Cover edges with foil to prevent over-browning, but remove for the last 10 to 15 minutes of baking time.  Fruit pies generally cook for about an hour at 400 degrees.
Cool for at least an hour before cutting.