Tuesday, January 27, 2015

Recipe - Acini Di Pepe Salad

I once heard a popular speaker apologize at the beginning of her talk to anyone who may have already heard some of the stories she was about to share.  "I'm really sorry," she exclaimed, "but I only have one life!"  I felt like that this week when trying to come up with  a theme for this post.  My choice of recipe most often comes from whatever is going on in my own life at the moment. I just don't have time to spend cooking (and photographing) for the sole purpose of sharing in Savings for Sisters--dear to me though you all may be!  This week, for example, I was called upon to whip up a batch of my niece Mandi's favorite Acini Di Pepe Salad to help with the big buffet lunch her mom was planning for her mission farewell on Sunday.  So Acini Di Pepe it is!

You can call it Frog Eye Salad if you want, but I don't want to.  I'd rather not think about frogs . . . or eyes . . . when I dig into this yummy concoction.  I don't know who first thought of marrying pasta to fruit, coconut, cool whip, and marshmallows, but it is unexpectedly refreshing and delicious. . . sometimes.  Why sometimes?  Because you can really screw it up.  Those of you who may have tasted and hated this dish at a family reunion in some dimly remembered past, my guess is that it wasn't done right.

Now that's not to say that it's hard to make.  It's very, very easy.  I'm going to share the secret to making your Acini salad turn out the way it was meant to be--light, fruity, and fluffy--not some gummy, gloppy disaster.  But first, you need to beg, borrow, or steal yourself one of these guys, if you don't already own one that is.
You need this.  See the tiny holes?  Not just any colander will do. It is large and made of fine stainless steel wire mesh that doesn't allow the cooked nubbins of Acini to fall through, which is essential for thorough rinsing. 


Acini Di Pepe Salad
1 (16 oz) box of Acini Di Pepe Pasta
2 (20 oz) cans Pineapple Chunks or Tidbits
1 (20 oz) can Crushed Pineapple
4 small or 3 large cans Mandarin Oranges
2 (8 oz) tubs of Cool Whip
2 cups Mini Marshmallows
1 cup Coconut
1 cup sugar
2 Tablespoons Flour
½ teaspoon Salt
2 large beaten Eggs
1 Tablespoon Lemon Juice
2 cups Pineapple Juice (reserved from draining the canned pineapple)
1 Tablespoon Cooking Oil

 Here's what you need

On the day before:

Open all the cans of fruit.  Save 2 cups of pineapple juice, but dump out the Mandarin orange juice.  Put fruit in fridge, covered, until the next day.
Combine sugar, flour, and salt in saucepan.  Beat eggs in small bowl and whisk in pineapple juice.  Stir this into the flour mixture and whisk until smooth. 
Cook over medium heat until thickened and bubbly.  Remove from heat and stir in lemon juice.  Set aside to cool.
Bring 4 quarts water to a boil in a large pot.  Add 2 teaspoons salt and 1 Tablespoon oil.  Pour the box of Acini into the rapidly boiling water. Boil approximately 10 to 12 minutes, stirring occasionally.  After about 10 minutes, start tasting it.  It needs to be cooked through, but just barely.  Do not over or under cook it!  It should be the same tenderness as you would want for any pasta.  See how these are still nice and firm, but fully cooked?
Place wire mesh strainer in sink.  It has to be big enough to hold all the Acini.  (The one I have is 8” in diameter and about 3.5” deep, which barely holds it).   Pour in the cooked Acini, letting the hot water drain down the sink. 
Refill your pot halfway with cold water.  Dump the Acini back in and stir around to rinse well.  Pour back into the strainer and refill the pot with cold water. (Note:  You could definitely use a smaller strainer—you will just have to be patient and work with the straining/rinsing process a little at a time).
Repeat this process at least two more times.  Then let the Acini drain for about ten minutes to make sure all the water comes off.  Move it about a bit to make sure no water is trapped.   

Thorough rinsing and draining is the most important part of the whole process.  If you get this right, the rest of the recipe is a cinch.  If it’s not rinsed well, some of the starches will remain, and that’s when it turns the whole salad gummy and no one likes it.

At this point, if the sauce isn’t cool, place it in the fridge a few minutes until it is.
Now combine the sauce with the Acini in large covered bowl and place in fridge until the next day.

Place containers of Cool Whip into fridge to thaw overnight.

Day of Serving:

Bring out pineapple and Mandarin oranges and drain off any accumulated juices—there will be quite a bit, and you don’t want it in the salad.
Fold Cool Whip into the Acini mixture (which will now be set and thick) until just mixed.
Stir in coconut and marshmallows.
Carefully stir in fruit.
Garnish with Maraschino Cherries if desired, cover tightly, and refrigerate until ready to star at your next party—at least three hours.  Leftovers will keep at least five days in the fridge.

Serves 25.

Tuesday, January 20, 2015

Recipe - Au Gratin Potatoes

Even though I grew up in Utah, I had never heard the term Funeral Potatoes until I was married and given my first assignment to make a pan of this cheesy concoction for a funeral in our ward.  Someone brought me a recipe which called for frozen hash browns, sour cream, cream of chicken soup, and cheese—the classic Funeral Potato recipe.   Once I made that first batch, it became clear to me that these were meant to be a quick and easy version of what our family had always referred to as Au Gratin Potatoes, (although the only common ingredient was the cheese).  The cheesy potato casserole I knew was made from scratch, with fresh potatoes simmered in their skins and a creamy homemade white sauce.  Although those first Funeral Potatoes were tasty, and I have occasionally made them through the years (usually substituting my own cooked, diced potatoes for frozen ones),  the old fashioned Au Gratin Potatoes I learned from my mother have always been most favored in our family, referred to as “the good kind” by my kids to distinguish them from the soup and sour cream version.

This is one of many dishes Mom showed me how to make as a girl that were never written down, so on Sunday I decided to make a batch for dinner, making note of exact measurements so I could share it with you.  These potatoes are the perfect comfort food.  They can even be made a day ahead, ready to pop in the oven after church.  I should warn that this is a big batch—great for family parties but too much for a small family.  It’s easy to cut the recipe in half, but you can also put it in two smaller pans and save one to bring out and cook up fresh later in the week.

Mom's Au Gratin Potatoes
20 medium Russet potatoes
½ cup (1 stick) butter
2 1/4 teaspoons salt
½ teaspoon pepper
1/2 teaspoon dry mustard
½ cup flour
1 teaspoon Worcestershire
1 can evaporated milk
3 cups regular milk
5 cups shredded medium cheddar cheese
Paprika (optional)

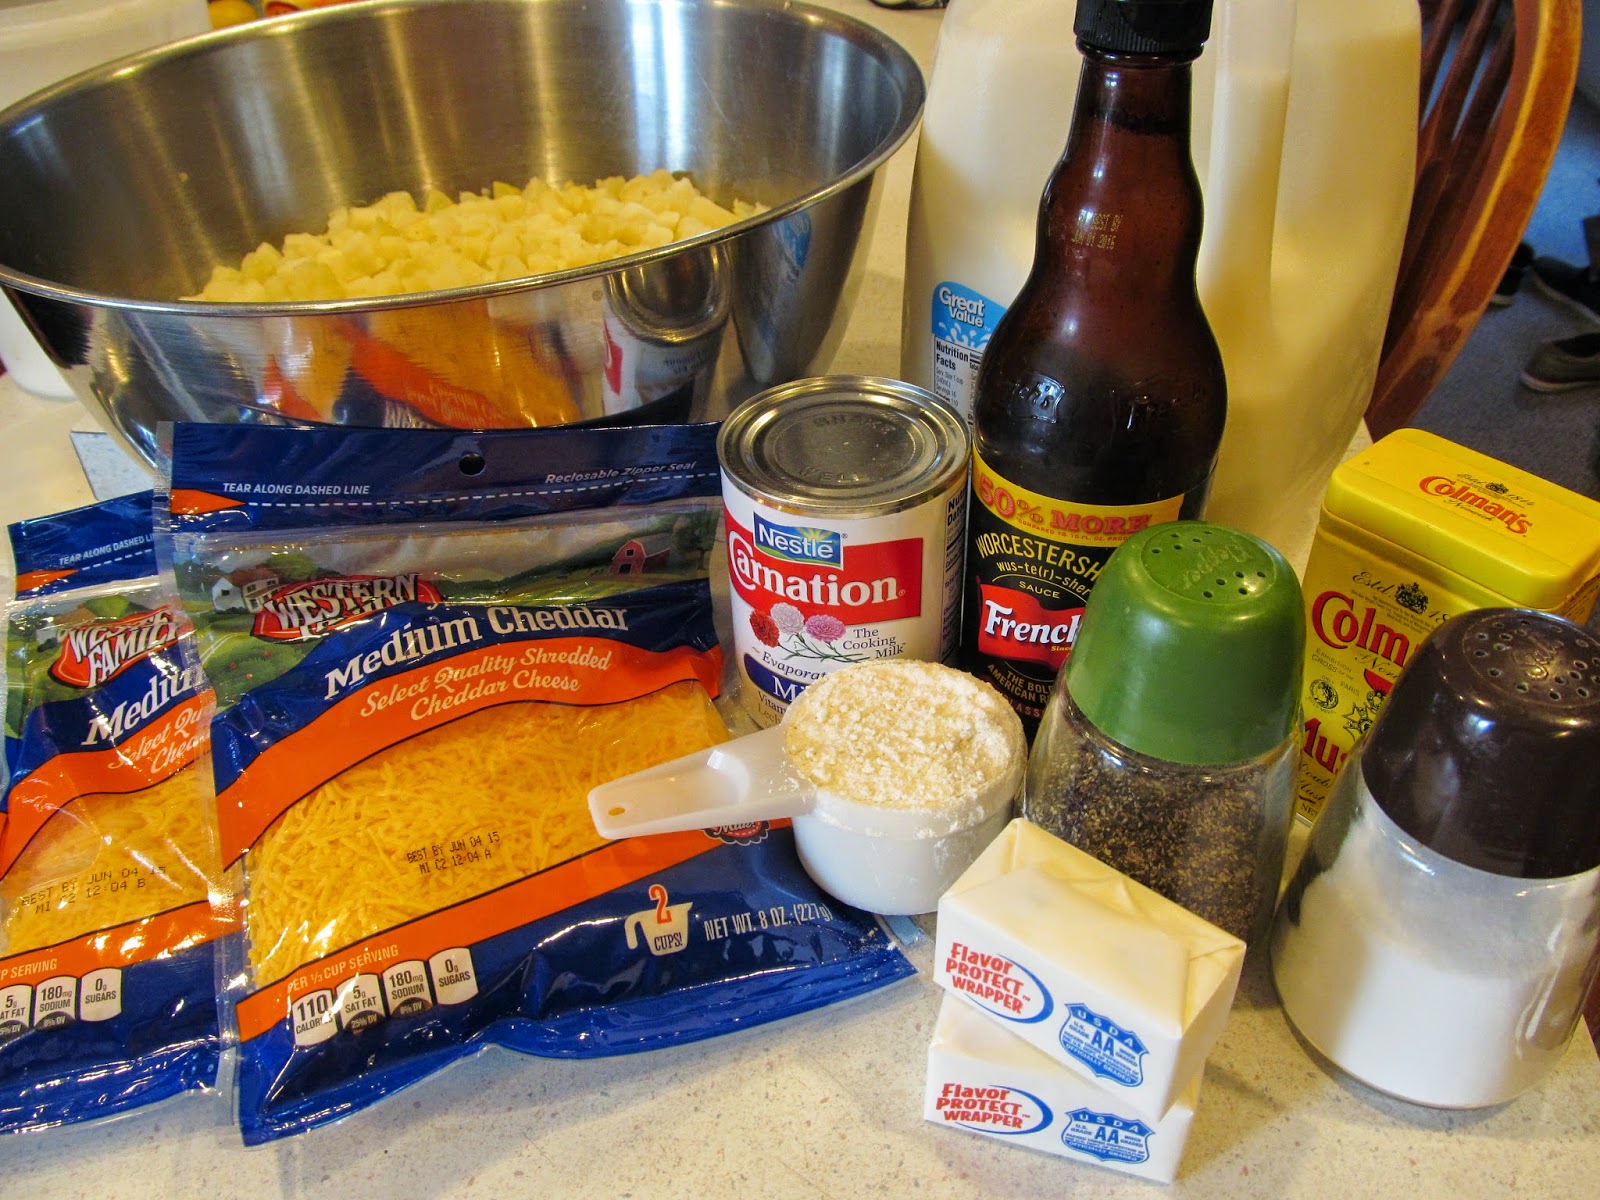
Here's what you need.  Notice that this is not two sticks of butter; the butter I had was divided into 8 stick (1/4 cup) portions.  Your butter will most likely be in 1/4 lb, 1/2 cup sticks.  Use just one stick.
-Scrub potatoes and place in 8 quart pot, with the largest ones on the bottom.
-Add 1 Tablespoon salt and barely cover with cold water.
-Bring to boil on high heat.  Immediately reduce heat and simmer until just tender when pierced clear into the middle with a toothpick or small paring knife (about 30 minutes or so).  Do not overcook!
-Drain potatoes and wait a few minutes until cool enough to peel (but still warm).
-Peel the potatoes with a small paring knife.  The skin should pull away easily while the potatoes are warm.
-Cool the peeled potatoes an hour or more in fridge, covered--if you have time. This will make them dice more easily without mushing up.  However, if you are in a hurry, skip this step.
-Dice the cold potatoes into cubes.
Make Sauce . . .
-Melt 1 stick of butter in large saucepan (I used the same pan I cooked the potatoes in after washing it).  Add salt, pepper, dry mustard, and Worcestershire.
-Whisk in the flour until smooth.
-Add the canned milk while mixture is still over medium heat, whisking in well to avoid lumps.  Then add the 3 cups regular milk while still whisking.  
-Continue to whisk mixture over medium heat until smooth and bubbly and thickened.  Be careful to not have the heat so high that it scorches on the bottom before it's ready.
-Remove from heat and add 3 cups of the cheese.  Stir until cheese has melted and it's smooth.
-Pour over potatoes and gently mix in well.
-Spoon into one large oblong (10” by 15”) or two small square glass casseroles.
-Cover with plastic wrap (not foil) and refrigerate (or cook immediately).
-When ready to cook, remove plastic wrap and cover tightly with foil.  
-Cook at 350 to 375 degrees for about an hour (perhaps longer if it’s been taken cold out of the fridge).
-When it’s bubbly and heated through well, sprinkle on the rest of the cheese--about 2 cups.
-Sprinkle lightly with paprika.
 -Place back in over with foil off.  Turn off oven and leave there until ready to serve.  If it will be longer than a few minutes, turn the oven to 150 degrees to keep them warm for up to 30 minutes.
-Serves 12-16 people.

Tuesday, January 13, 2015

Recipe - Oven Beef Stew

I love it when we have the 11-2 block for church.  For one thing, I have time in the morning to get dinner preparations somewhat underway.  Because we can't eat until 4:30 or 5:00 when my husband returns from his student ward, I also have some time after church to finish things up at a leisurely pace.  This past Sunday I decided to make Oven Beef Stew, a hearty, healthy wintertime favorite.

I was determined this year to use every last precious garden potato--including the marble sized ones that have sifted to the bottom of my big potato bucket. These take a very long time to peel, and every time I finished one of these bite-sized nuggets on Sunday morning, I pictured a family member casually forking it into his mouth in one bite, with no thought to my painstaking peeling--which at times involved the skin on my fingertips!

If you've ever purchased stew meat at the grocery store, you know that it generally isn't very lean or of very high quality.  Not only that, it's expensive.  Because of this, years ago I started making my own by watching for cuts of lean, boneless beef and cutting it into chunks with all visible fat removed.  Almost any boneless beef works well for this, including rump roast, sirloin steak, London broil, round steak--whatever you find a good deal on.  (The Rump Roast for $3.99/lb at Maceys this week would be a good choice for this).  I cut it into cubes with a sharp knife and place portions in freezer bags for later use, ready to turn into stew, stroganoff, or a variety of other meals calling for boneless beef.  See instructions for Oven Beef Stew below.

 Oven Beef Stew

1.5 to 2 lbs Beef Stew Meat (see instructions at beginning of post for preparing your own)
1 can Campbell's Cream of Mushroom Soup
1 can Campbell’s Cream of Chicken Soup
1 small can Tomato Sauce
2 teaspoons Worcestershire Sauce
1 packet Lipton’s Onion Soup Mix
2 onions cut into about 8 chunks each
About 10 carrots or so peeled and sliced into sticks
About 10 medium potatoes or so peeled and cut into chunks
3 to 4 stalks celery with leaves, sliced
12 to 16 ounces frozen Petite Peas
2 beef bouillon cubes
Salt and Pepper


 Here's everything you need. 

-Peel and cut vegetables.  Set aside.
  For a head start on dinner, I like to get my carrots and potatoes peeled before church, then cover them with cold water.

-Mix together the mushroom and chicken soups, tomato sauce, and Worcestershire (I forgot to add the Worcestershire before the photo).
-Microwave 2 bouillon cubes in a small amount of hot water, then crush with fork to dissolve.  Add to soup mixture.
-Place meat in the bottom of a large Dutch Oven and sprinkle with Onion Soup Mix.
-Place onions and celery on top of that. 
-Sprinkle well with salt and pepper.
-Place carrots and potatoes next, sprinkling with salt and pepper after each layer.
-Pour soup mixture on top.  Use a butter knife to help the sauce flow down between the veggies a bit, but don’t stir.
-Cook at 325 to 350.  It takes approximately 2 1/2 to 3 hours at 325 but maybe only a little over 2 hours at 350.  It's better to allow extra time, because you can always turn the oven way down and hold it for up to an hour after it's done.
-After it has been cooking 1 hour, gently stir it together, bringing the meat up from the bottom to mix with the vegetables.  At this point you will have a pretty good idea of how much longer you will want to cook it.  It will be quite undone still and most likely need at least another hour.
-About 20 minutes before time to serve, open the lid, dump in the frozen peas, and close the lid without stirring.  
-After 20 minutes, stir the peas into the stew, and it is ready to serve.  Serves 8.