Tuesday, July 28, 2015

Tipof the Week - Adventures in Squash Blossoms

It all started when we were having a garage sale a couple of weeks ago.  One of the shoppers approached me and asked if I would sell her the blossoms off our summer squash. I was a bit taken aback.  My squash blossoms?  I glanced from the driveway into my garden, and it was like I was seeing them for the first time.  In the early morning sunlight, the bright flowers shone like glorious yellow orbs amid the dark green leaves.  I was a little perplexed.  What did she want my blossoms for?  Then as she begin to regale me with descriptions of the authentic Mexican dishes she made with them, I remembered I had once heard Martha Stewart wax eloquent about Fried Squash Blossoms, but I honestly thought it was either a joke or some weird gourmet thing that only Martha would attempt to make.  In light of this,  I was all for selling my blossoms to this lady, but when I talked to John, he was afraid that if she picked our blooms, the squash wouldn't mature.  Even though she assured us this wouldn't happen, we were a little insecure about the idea of allowing a stranger to ravage our lovely plants, so we politely declined.
Then I started doing research.  I was very intrigued by the whole idea of essentially eating flowers, and was soon immersed in fascinating explanations of how to tell the girl blooms from the boy blooms.  The females, it turns out, should not be harvested if you want to eventually eat the tiny squashes growing from them.  The males are needed to pollinate the female squash plants, but you only need a fraction of the amount growing in your garden.  Therefore, you can harvest some of the males (which are easy to distinguish from the females because of their slender stalk and lack of a baby squash) and just leave a few to do their duty, so to speak. Your zucchini and yellow squash will continue to produce just fine.
After reading numerous and varied versions of how to make Fried Squash Blossoms, I came up with my plan for a trial run.  Because the blossoms open in the morning hours and close up again by afternoon/evening, I ventured out at 7 o'clock Sunday morning to gather them in.  I had read that you should eat them the day you pick them, so I decided to make my attempt in time to serve them with our Sunday dinner.  There were plenty to choose from, and it was easy to tell the boys from the girls.
I picked some zucchini and yellow squash while in my garden.  The bigger ones I made yesterday into our family favorite--Crispy Squash.  The yellow ones I sauteed and creamed for dinner tonight.  As you can see, I believe in picking them when they are small and tender for the most part, but some get away from me!
Here are my gorgeous blossoms.  I decided to pick 14, which would give 2 to each person and 2 left for making mistakes on.  These are a mixture of zucchini and yellow crookneck squash, yet they all look alike.  Who knew they were such a delicacy?  These are sold at farmer's markets in places where they are plentiful, but they are still hard to come by and sell out quickly.  Because they are so perishable, people who buy them know they need to be used as soon as possible. Squash farmers harvest them to sell to local restaurants.
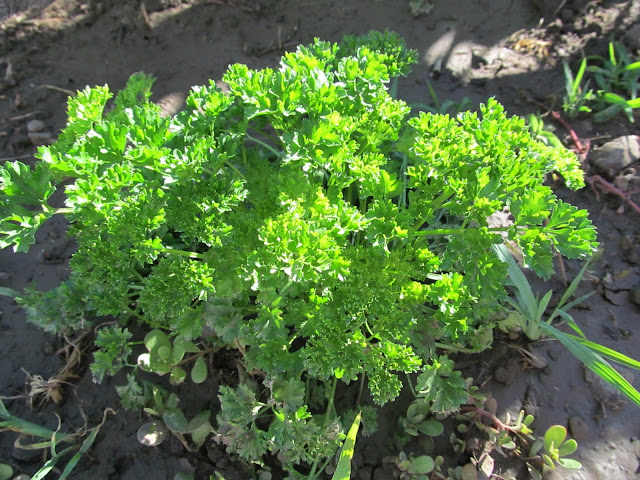
I took them straight to the kitchen and put them in the fridge, covered, until after church.  I also cut some fresh parsley, chives, and basil to use in the recipe I concocted for the filling.
I hope I've sparked your interest in my Squash Blossom Adventure.  To read more, scroll down past the grocery listings and see how they turned out. (HINT:  They were delicious!)

Fried Squash Blossoms

For 12-15 squash blossoms. . . 

Filling:
Heaping 1/2 cup whole-milk ricotta cheese
1 egg yolk
1/2 teaspoon dried oregano leaves
½ cup fresh ground bread crumbs
½ teaspoon salt
¼ teaspoon pepper
(Optional:  fresh chives, parsley, basil—some of each or whatever fresh herbs you have.)

Batter:
¾ cup cornstarch
1/4 cup flour
1 teaspoon baking powder
1/4 teaspoon pepper
1/2 teaspoon seasoned salt
1/2 cup water
1 egg  

Vegetable oil for frying

Wash the blossoms:  Gently swirl them in a bowl of cold water.  Drain on a towel.
Mix up the filling.  Grind up some crumbs from whatever bread or rolls you have on hand or in the freezer.  (You only need to use about one roll or slice of bread to make the ½ cup crumbs).  Stir this into the ricotta cheese, egg yolk, seasonings, and herbs. Place in fridge.
Prepare the squash blossoms. Carefully separate the flower petals without breaking them and remove the pistil in the center with scissors.  Bring a small pot water to a boil and prepare a bowl of ice water. Carefully place blossoms into the boiling water, remove after a few seconds, transferring immediately into the some ice water to chill.  Remove and lay on paper towels to drain.
 NOTE:  This was an experimental process for me, and I decided that the boiling water process made the blossoms way too delicate.  They were like tissue paper and the petals were very hard to separate.  Next time I plan to just dip them by the stem, one by one, into boiling water for just a second or two, so as to not overcook the petals.  I may also try filling them with no blanching at all, which some recipes suggest.  If you do it this way, instead of the fold-over method I describe below, just twist the tops closed over the filling.

Fill the blossoms:  Spoon filling into a zip-lock bag.  Gently insert the cut corner of the bag all the way to the bottom of the open end of a blossom and pipe as much filling as each will hold. Pick up petals and drape them up over the filling, covering filling completely. Fold any excess petals over the top of the filled blossom to keep them out of the way.
This is the way they should all look!
But the reality? Some good, some not so good!  Next time I plan to do a much better job, but since I made all the mistakes, you can do great the first time!
Place in the refrigerator for at least 30 minutes.  If it will be longer than that, cover with plastic wrap.

Make the batter: Combine the first 5 ingredients, and then stir in the egg and water until smooth. Refrigerate batter for at least 20 minutes.

Dust with flour:  Dip each of the blossoms into flour and shake gently or blow off the excess.  This will help the batter to stick.
Fry the blossoms:  Heat about an inch of oil in a skillet to 350 to 375 degrees.
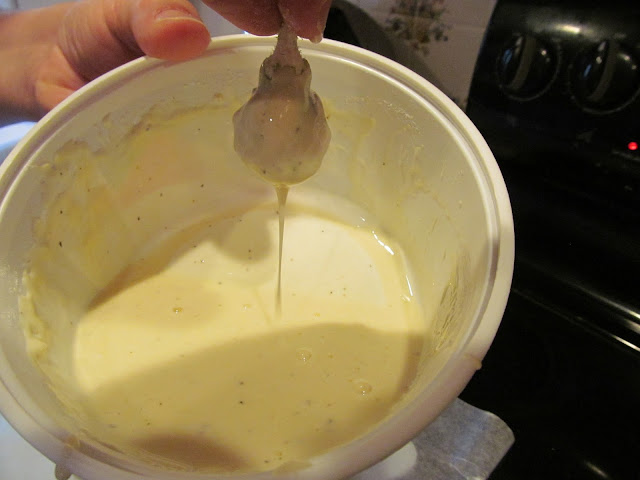
Get the batter out of the fridge and dip each blossom in batter, coating it. Carefully place each batter-covered blossom in the hot oil and fry until golden crisp.  Remove and drain on paper towels, then sprinkle with salt to taste.  Eat them down to the stem and discard the stem.
Makes 5 appetizer portions of 2 to 3 each.  Serve immediately.

Tuesday, July 21, 2015

Tip of the Week - My Favorite Things

So this is what's been happening at my house.  After 19 years in the home my husband built for us here in Providence, we have undertaken a substantial remodeling project.  What you are looking at is the wall between my kitchen and laundry room being torn away for the construction of a new big kitchen!  (The laundry room is moving upstairs).  I am, to say the least, very excited about this; however, it doesn't come without a price, which all of you ladies can imagine.  Making dinner is a challenge these days, but I am determined to make it a priority most nights even in the midst of our chaos.
The biggest challenge, which brings me to the point of this post, is that I have had to box up the biggest part of my everyday supplies--cookware, small appliances, dishes, Tupperware, kitchen tools--you name it.  Cabinets are gone, as you can see, and in their stead a large metal storage shelf unit like they have in restaurant kitchens that can be wheeled from place to place while John works. (Doesn't it look lovely next to the fireplace?) This holds the bare essentials to keep life functional for us--a few plates and glasses, pans, mixing bowls, dish towels.  Let's just say I won't be inviting any of you over for dinner anytime soon!
Thinking about what to keep out and what to box up has made me feel, in a small way, like the pioneers choosing what to load on their wagons.  It isn't easy to decide what stays and what goes, whether you have a little or a lot--and in my case, when it comes to my kitchen, I must admit that I have a lot!  I was stunned at the number of huge boxes I've filled up so far.  So again, to get to the point, I decided it would be fun, in lieu of a recipe this week, to show you a few of the kitchen items I cannot live without and explain why.  These are the things that through their usefulness have earned a spot on my metal shelves.  And who knows?  Maybe after a few months of life with only the bare necessities, I'll decide I don't need those 20 boxes stacked in the garage at all. . . but don't hold your breath!

Here are a few of my favorite things . . .

1.  My Crockpot Collection.  This isn't the whole collection.  These are just a few I am musing over as to which sizes I cannot go several months without.  I think I've got myself whittled down to the biggest one (not shown) and one of the normal sized ones.  Don't scoff at the volume of pots.  Every now and again one of my Relief Society sisters is grateful for one-stop shopping at my house when she needs to borrow crockpots for a church dinner she's in charge of.  Some of these work horses have been around since I got married.
2.  My Huge Skillet.  This fellow has obviously seen better days.  Finally, about a month ago, after two decades of screwing it back on, the handle broke off for good.  Over a foot in diameter and nearly 3 inches deep, this fry pan can handle up to 4 lbs of ground beef, brown 6 pork chops with ease, or produce enough Stir-Fry for a small army.  I did some quick calculations and determined this pan has been used somewhere in the neighborhood of 1500 times!  The other day when the handle broke for the last time, my husband urged me to throw it away.  Is he out of his mind?  They may have to bury me with this pan. 
So what's so great about it?  It's made of 18/10 stainless steel.  I'm not sure exactly what that means, except that it makes the pan bottom very heavy and that things never burn.  I love this skillet so much that after I got it all those years ago, I've slowly replaced every flimsy pot or pan I ever owned with pieces that have this marking on the bottom.  I don't think one brand is superior to another (mine are all different brands), as long as I see the 18/10 mark, I'm happy.
3.  My Cuisinart Food Processor.  My life began the day my sister gave me this machine.  It does everything, from mincing cilantro to crushing graham crackers to shredding cheese.  It blends sauces, slices onions paper thin, and purees fruit for making jam.  The button labels are nearly worn off, and I'm afraid I'll soon be needing a new one.  I don't know how I got along all those years without this guy, and I wasn't about to box him up for any amount of time. By the way, next to him are a few of my stainless steel serving spoons of all sizes of which I can never have too many.
4.  Colanders and Wire Strainers.  I know this looks a bit excessive, but I really needed to save out one of each size.  From draining pasta in the big one to straining lumps out of gravy thickener with the smallest one, I grab one or more of these almost every time I cook.
5.  My Rice Cookers.  I have a big one and a little one, so I just kept out the little one.  When I took the picture, it still had rice in it from dinner tonight!  Like the food processor, I don't know why I went so long without one of these.  All those years I agonized over how high the heat under the pan needed to be after the rice started to simmer.  Would it really be done when I took of the lid, still watery, or stuck to the bottom?  If I guessed wrong and opened too soon, it never seemed to come out right.  With a rice cooker you dump in rice, water, salt, and butter, push a button, and never think about it again.  It comes out perfect every single time.  When it's done, it stays warm automatically until you're ready to serve it.  To me, this is a big deal and I love this appliance.
6.  My Stainless Steel Bowls.  From my set of about 8 which nest inside each other, these are the ones I didn't box up.  They last indefinitely and have a multitude of uses, as attested to by the fact that every church kitchen is stocked with them.  A few years ago for Christmas I received the grandaddy of them all, a bowl so huge we call it the "Bath a Baby" bowl.  It's main purpose is to fill with enough popcorn for a dozen people, which my kids loved doing when their friends came for movies or games.  Sadly, Bath-a-Baby is in storage for the duration (I'm not exactly throwing a party in this mess), but these few survived the cut. 
7.  My Rubbermaid Microwave Plates.  Nothing is easier than filling up these plates with leftovers at the end of a meal.  The lids snap on tight for fridge storage and can be loosened slightly when rewarming.  They are great for taking a dinner to one or two people to warm up when ready, or stacking in the fridge for each family member to grab when convenient.  I've collected 8 or 10 through the years and they have held up through countless uses. I'm sure they'll come in very handy during my remodel.
8.  My Shelfies (not to be confused with selfies!).  These are great for maximizing shelf space in your cabinets, and they are equally useful now that I need all the space I can get on my kitchen-on-wheels!  They come in various shapes and sizes to meet a multitude of storage needs.
9.  My Hotel Pans and Lids.  I have four of these monsters, and use them all.  These are huge, restaurant style stainless steel pans that barely fit into a standard sized oven.  I can't tell you how many times I've been so glad I didn't have to divide food for a large group into several regular sized baking dishes--brownies, casseroles, Au gratin potatoes, cobbler--the list goes on and on.  I only left one out, and maybe I won't need it in the coming months, because as I said, I'm not planning a party. . . but I didn't feel secure without access to at least one.
Of course there are a few more things, but I'll conclude with a picture of a few kitchen tools I use all the time.  I am a bit of a hoarder when it comes to handy gizmos, so believe me it was difficult to just box most of them up (and I mean an enormous box filled with nothing but small kitchen tools).  I'm already feeling a bit anxious about the hundred or so--I'm not exaggerating--items in that box that are already deep in storage in the garage.  Here is my now tiny collection.
10.  Small Kitchen Tools:  Potato Masher, Serrated Chopper, Rubber Spatulas, Metal Whisks, Patty Press, Piggy, Pizza Cutter, Funnels, Graters, extra wide Turner, and my Cutco Knives.
Most of these need no explanation.  I've regaled you with tales of Piggy in past posts, and the Patty Press quickly makes evenly sized burger patties to stack in the freezer.  This isn't everything I saved, of course, but these are some of my everyday favorites.

So that's it!  I hope no one is disappointed about no recipe, but really, haven't we all been eating (and cooking) enough this Summer anyway?  (OK, maybe that's just me).  In any case, by next week perhaps my counters will be cleared off and some clean little corner set aside to make something delicious to share with you--hopefully not a frozen dinner!

Tuesday, July 14, 2015

Recipe - Fresh Raspberry Pie

This past week we celebrated my Dad's 80th Birthday, so I wanted to dedicate today's post to him and talk about one of his favorite desserts--Fresh Raspberry Pie.  I made this for him on Sunday with raspberries from our garden, but if you don't grow your own, they are usually available during the summer months at our local stores.
Here's Dad about to dig into his birthday pie!  Just in time for his 80th celebration, he completed an amazing project with its origins clear back in 1951.  He is one talented guy, and our whole family is so proud of his accomplishment that we have shamelessly shared it as much as possible these past weeks.  If you missed the very interesting KSL news story about him and his 1934 Ford Tudor, those interested can watch it HERE.  Happy Birthday Dad!

Fresh Raspberry Pie
-First, make up your pie crust.  If you are interested in using my crust recipe, go HERE. 
-Wash 1 1/2 to 2 lbs raspberries and drain well. 
-Prepare Raspberry Flavored DANISH DESSERT according to package directions for Pie Glaze, using 1 1/2 to 1 3/4 cup cold water.  Let cool at room temperature for 30 min or so.
-Divide crust dough in half if you are making a big pie.  If you are making a smaller pie, divide the crust into 3.  You can either bake the additional crust and freeze for later use, or just freeze the remaining dough in portions to thaw and bake later.


-Roll out crust, place in pie pan, and flute the edge as desired.  Prick the bottom and sides of the crust with a fork. 


-Bake in a preheated 400 to 425 degree oven for 10 to 15 minutes.  After 10 minutes, check and watch it carefully.  You want it as crispy as possible without burning. Keep a close eye on it!
-Let cool at least 30 minutes.
-Add the Danish Dessert sauce.  Fold in carefully so as not to break up the berries.
-Sprinkle the bottom of the cooled crust lightly with powdered sugar.
-Spoon raspberry filling into cooled pie shell.
-Refrigerate several hours, covered with plastic wrap.
-Top with 1/2 pint of whipped cream with sugar and vanilla added.
SERVES 8.